Webmin
WebminIn a previous project, I used Webmin, and liked it, so I'm going to use it again here. It makes it easier for a windows user to control a linux system.
Copied instructions from here
SSH is a simple way to remotely log in to your machine’s command-line interface, but that’s not always the most convenient way to work. There is a wonderful web administration system called Webmin that can handle a lot of the “magic” of system configuration. Webmin can take care of a lot of the tasks you’d normally do from the command line, but in a much friendlier way. In addition, you can add Webmin modules for many of the features we’ll be adding to the Raspberry Pi in this series.
It’s pretty easy to install, so let’s get started.
You can’t just install Webmin through apt-get like the other software packages so far because apt-get doesn’t know about Webmin, or at least it doesn’t know about it yet. There are several approaches to a Webmin installation, but I’ve found that the easiest is to simply tell apt-get where to get the packages it needs for Webmin. Edit apt-get’s list of sources like this:
sudo nano /etc/apt/sources.list
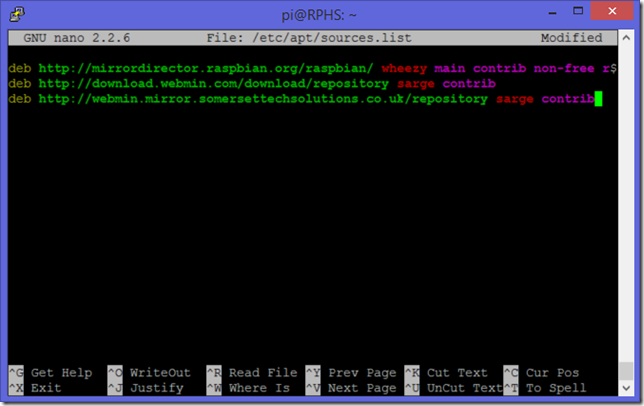
When the editor appears, add the following two lines to the end of the file:
deb http://download.webmin.com/download/repository sarge contrib
deb http://webmin.mirror.somersettechsolutions.co.uk/repository sarge contrib
Note: Your browser may wrap these lines, but make sure they go in the sources.list as two lines like this:
Press Ctrl-x,y,enter to exit nano, saving the file. Next you’ll need to import the signing key that verifies the packages coming from the new repository. These next few commands need to be run as the actual root user of the machine. This is the first time this series has done this, so I’ll break it down for you. Type the following to temporarily become the root user:
sudo su
Your command prompt will change, losing all of its color, and becoming more sinister, dark, and dangerous looking like this:
You are now operating as the root user of the machine. The root user can do pretty much anything. Unlike the Windows world, Linux users try to spend as little time in “God-mode” as possible.
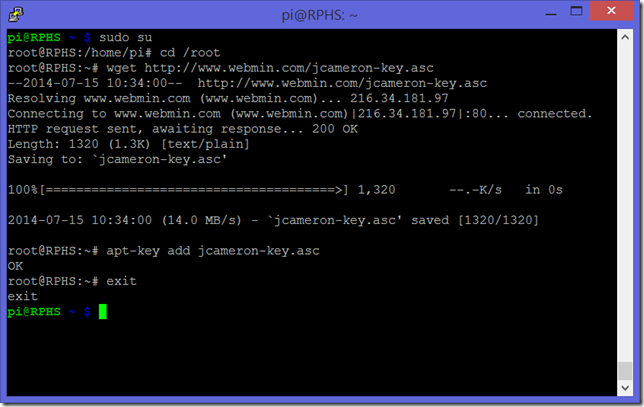
Type the following commands to import the Webmin repository’s signing key:
cd /root
wget http://www.webmin.com/jcameron-key.asc
apt-key add jcameron-key.asc
exit
That last “exit” tells the system that you want to stop being the root user now, and go back to being “pi”. The final result should look like this:
Now that you’ve added Webmin’s repository to the list of places apt-get will look for stuff, update the list of available packages again.
sudo apt-get update
Note: You may or may not see an error during this process. I presume that’s why the Webmin folks had you add two repositories, in case one of them is down. If you get an error, try the next steps anyway. If it still fails, double-check that you got the repository addresses exactly right, and try again.
Randy note: It worked for me no problem.
Randy note: It worked for me no problem.
Now that apt-get knows where to get Webmin, you can install it just like you have everything else so far.
sudo apt-get install webmin
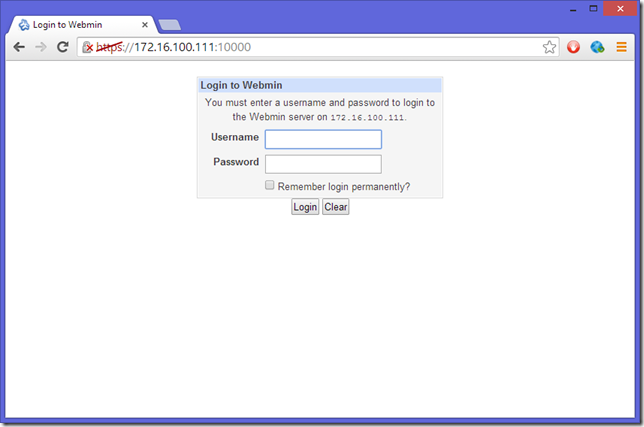
When the installation is complete, you can test it by opening a browser, and navigating to the IP address of your server, but specifying https and port 10000 rather than the default http port of 80. If you forget the “https” part, you’ll see a friendly page that offers to redirect you. Either way, you’ll probably also get a warning about the site not having a valid certificate, which it doesn’t. Proceed to the page anyway, and the result should look like this:
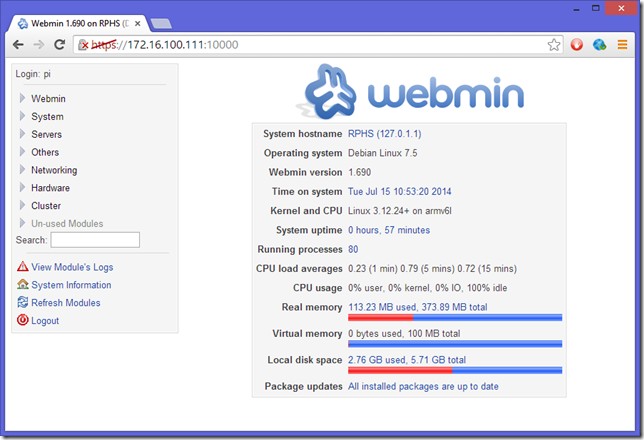
Log in as “pi”, and you’ll see the main Webmin interface, which looks like this:
Poke around a bit, and see what Webmin is all about. You can monitor storage and memory usage from here, be notified about updates, apply them, manage user accounts, and a lot more.
Look inside the “Un-used Modules” section to see all the things that Webmin could help you manage, if you had those packages installed. It’s a pretty impressive list.
Wrapping up
You’ve reached another milestone, and I strongly recommend politely shutting down the Raspberry Pi (sudo shutdown –h now), and taking another backup of the SD card.


No comments:
Post a Comment